LLM启动大全
大模型发展至今,已经诞生了各种各样的部署框架以及使用方式,他们通常适用于不同的场景。现在通过自己了解的知识对大模型的各种启动方式做一个总结。
模型下载
首先启动大模型,首先需要下载一个模型,模型的下载首选地址为HF官网模型库:https://huggingface.co/models
假设你的网络不能进入上述网址,可以进入魔搭社区下载,大部分模型都会同步到这里:https://www.modelscope.cn/models
我们这里使用Qwen1.5系列的模型做示例,具体的模型型号为Qwen1.5-4B-Chat。
模型启动
使用最原始的Transformer框架启动,需要写一小部分代码,官方已经为你写好了Demo,地址在https://www.modelscope.cn/models/qwen/Qwen1.5-4B-Chat/summary。
为了通用性,我对代码做了略微的修改:
 1
 2
 3
 4
 5
 6
 7
 8
 9
10
11
12
13
14
15
16
17
18
19
20
21
22
23
24
25
26
27
28
29
30
31
32
33
34
35
36
37
38
39
40
41
42
43
44
45
46
47
48
49
50
51
52
53
54
55
56
57
58
59
60
61
62
63
64
65
66
67
68
69
70
71
72
73
74
75
76
77
78
79
80
81
82
83
84
|
import torch
from transformers import AutoTokenizer, AutoModelForCausalLM, TextStreamer, TextIteratorStreamer
from threading import Thread

import os

from .model_zoo import *
from .utils import highlight_text


class Qwen1_5():
    def __init__(self, modelName) -> None:
        # 检查是否支持模型
        assert modelName in llm_weight_zoo, "modelName should be in {}".format(llm_weight_zoo.keys())
        modelWeightPath = llm_weight_zoo[modelName]
        # 检查本地是否下载模型
        assert os.path.exists(modelWeightPath), "Model weight file: {} ".format(modelWeightPath) + \
                                                "does not exist.\n Please download {} ".format(modelName) + \
                                                "model in " + \
                                                highlight_text("'{}'".format(llm_model_url_zoo[modelName]))
        # 加载分词器
        self.tokenizer = AutoTokenizer.from_pretrained(modelWeightPath, trust_remote_code=True)
        # 加载模型
        self.model =  AutoModelForCausalLM.from_pretrained(modelWeightPath, torch_dtype="auto",
                                                           device_map="auto",
                                                           trust_remote_code=True)
        self.device = torch.device("cuda" if torch.cuda.is_available() else "cpu")
        self.model_name = modelName

    def get_prompt(self, user_message, system_message):
        if system_message == "":
            system_message = "You are a helpful assistant."

        assert user_message != None, "我是{}大模型,你必须输入提问问题".format(self.model_name)
        messages = [
            {"role": "system", "content": system_message},
            {"role": "user", "content": user_message}
        ]

        return messages

    def chat(self, messages, max_tokens=2048, temperature=0.6, top_p=0.9):
        # 调用模型进行对话生成
        input_ids = self.tokenizer.apply_chat_template(messages, tokenize=False, add_generation_prompt=True)
        model_inputs = self.tokenizer([input_ids], return_tensors="pt").to(self.device)
        generated_ids = self.model.generate(model_inputs.input_ids, max_new_tokens=max_tokens,
                                            temperature=temperature,
                                            top_p=top_p)
        generated_ids = [
            output_ids[len(input_ids):] for input_ids, output_ids in zip(model_inputs.input_ids, generated_ids)
        ]
        response = self.tokenizer.batch_decode(generated_ids, skip_special_tokens=True)[0]

        return response

    def streamChat(self, messages, max_tokens=2048, temperature=0.6, top_p=0.9):
        # 流式输出对话
        input_ids = self.tokenizer.apply_chat_template(messages, tokenize=False, add_generation_prompt=True)
        model_inputs = self.tokenizer([input_ids], return_tensors="pt").to(self.device)
        streamer = TextStreamer(self.tokenizer, skip_prompt=True, skip_special_tokens=True)
        generated_ids = self.model.generate(model_inputs.input_ids, max_new_tokens=max_tokens,
                                            temperature=temperature,
                                            top_p=top_p,
                                            streamer=streamer)
        generated_ids = [
            output_ids[len(input_ids):] for input_ids, output_ids in zip(model_inputs.input_ids, generated_ids)
        ]
        response = self.tokenizer.batch_decode(generated_ids, skip_special_tokens=True)[0]

        return response

    def streamIterChat(self, messages, max_tokens=2048, temperature=0.6, top_p=0.9):
        # 流式输出对话迭代器
        input_ids = self.tokenizer.apply_chat_template(messages, tokenize=False, add_generation_prompt=True)
        model_inputs = self.tokenizer([input_ids], return_tensors="pt").to(self.device)
        streamer = TextIteratorStreamer(self.tokenizer, skip_prompt=True, skip_special_tokens=True)
        generation_kwargs = dict(model_inputs, max_new_tokens=max_tokens,
                                 temperature=temperature,
                                 top_p=top_p,
                                 streamer=streamer)
        thread = Thread(target=self.model.generate, kwargs=generation_kwargs)

        thread.start()
        yield from streamer
|
其中model_zoo.py用于做模型名字和模型文件地址的映射。这样一来,只要实例化Qwen1_5这个类便会在本地加载大模型,然后调用不同的方法进行大模型问答。
模型调用结果示例
使用Postman进行外部调用:
1
2
3
4
|
{
    "prompt": "你好,请给我讲一个故事,随便编一个",
    "system_prompt": ""
}
|
调用结果:
1
2
3
4
|
{
    "response": "好的,下面是一个关于小猫咪的故事:\n\n从前有一只可爱的小猫咪,名叫咪咪。它住在一个美丽的花园里,每天都会在花园里玩耍和探索。\n\n有一天,咪咪发现了一个隐藏的洞穴。这个洞穴看起来非常神秘,里面充满了未知的冒险。于是,咪咪决定要深入洞穴探险。\n\n咪咪走进洞穴,发现里面有许多有趣的生物和奇妙的事物。它遇到了一些友善的兔子,还有一些凶猛的野猫。但是,咪咪并没有被吓到,反而更加兴奋地探索这个神秘的世界。\n\n在这个过程中,咪咪还学会了如何使用它的爪子挖掘洞穴,如何用鼻子寻找食物,甚至如何在黑暗中找到回家的路。它也结识了一些新的朋友,并且从中学到了很多新知识。\n\n最终,咪咪成功地回到了家,告诉了主人它的冒险经历。虽然它有些疲惫,但它非常开心,因为它知道它已经成长了许多。\n\n这就是关于咪咪的一个故事,希望你喜欢!",
    "status": 200
}
|
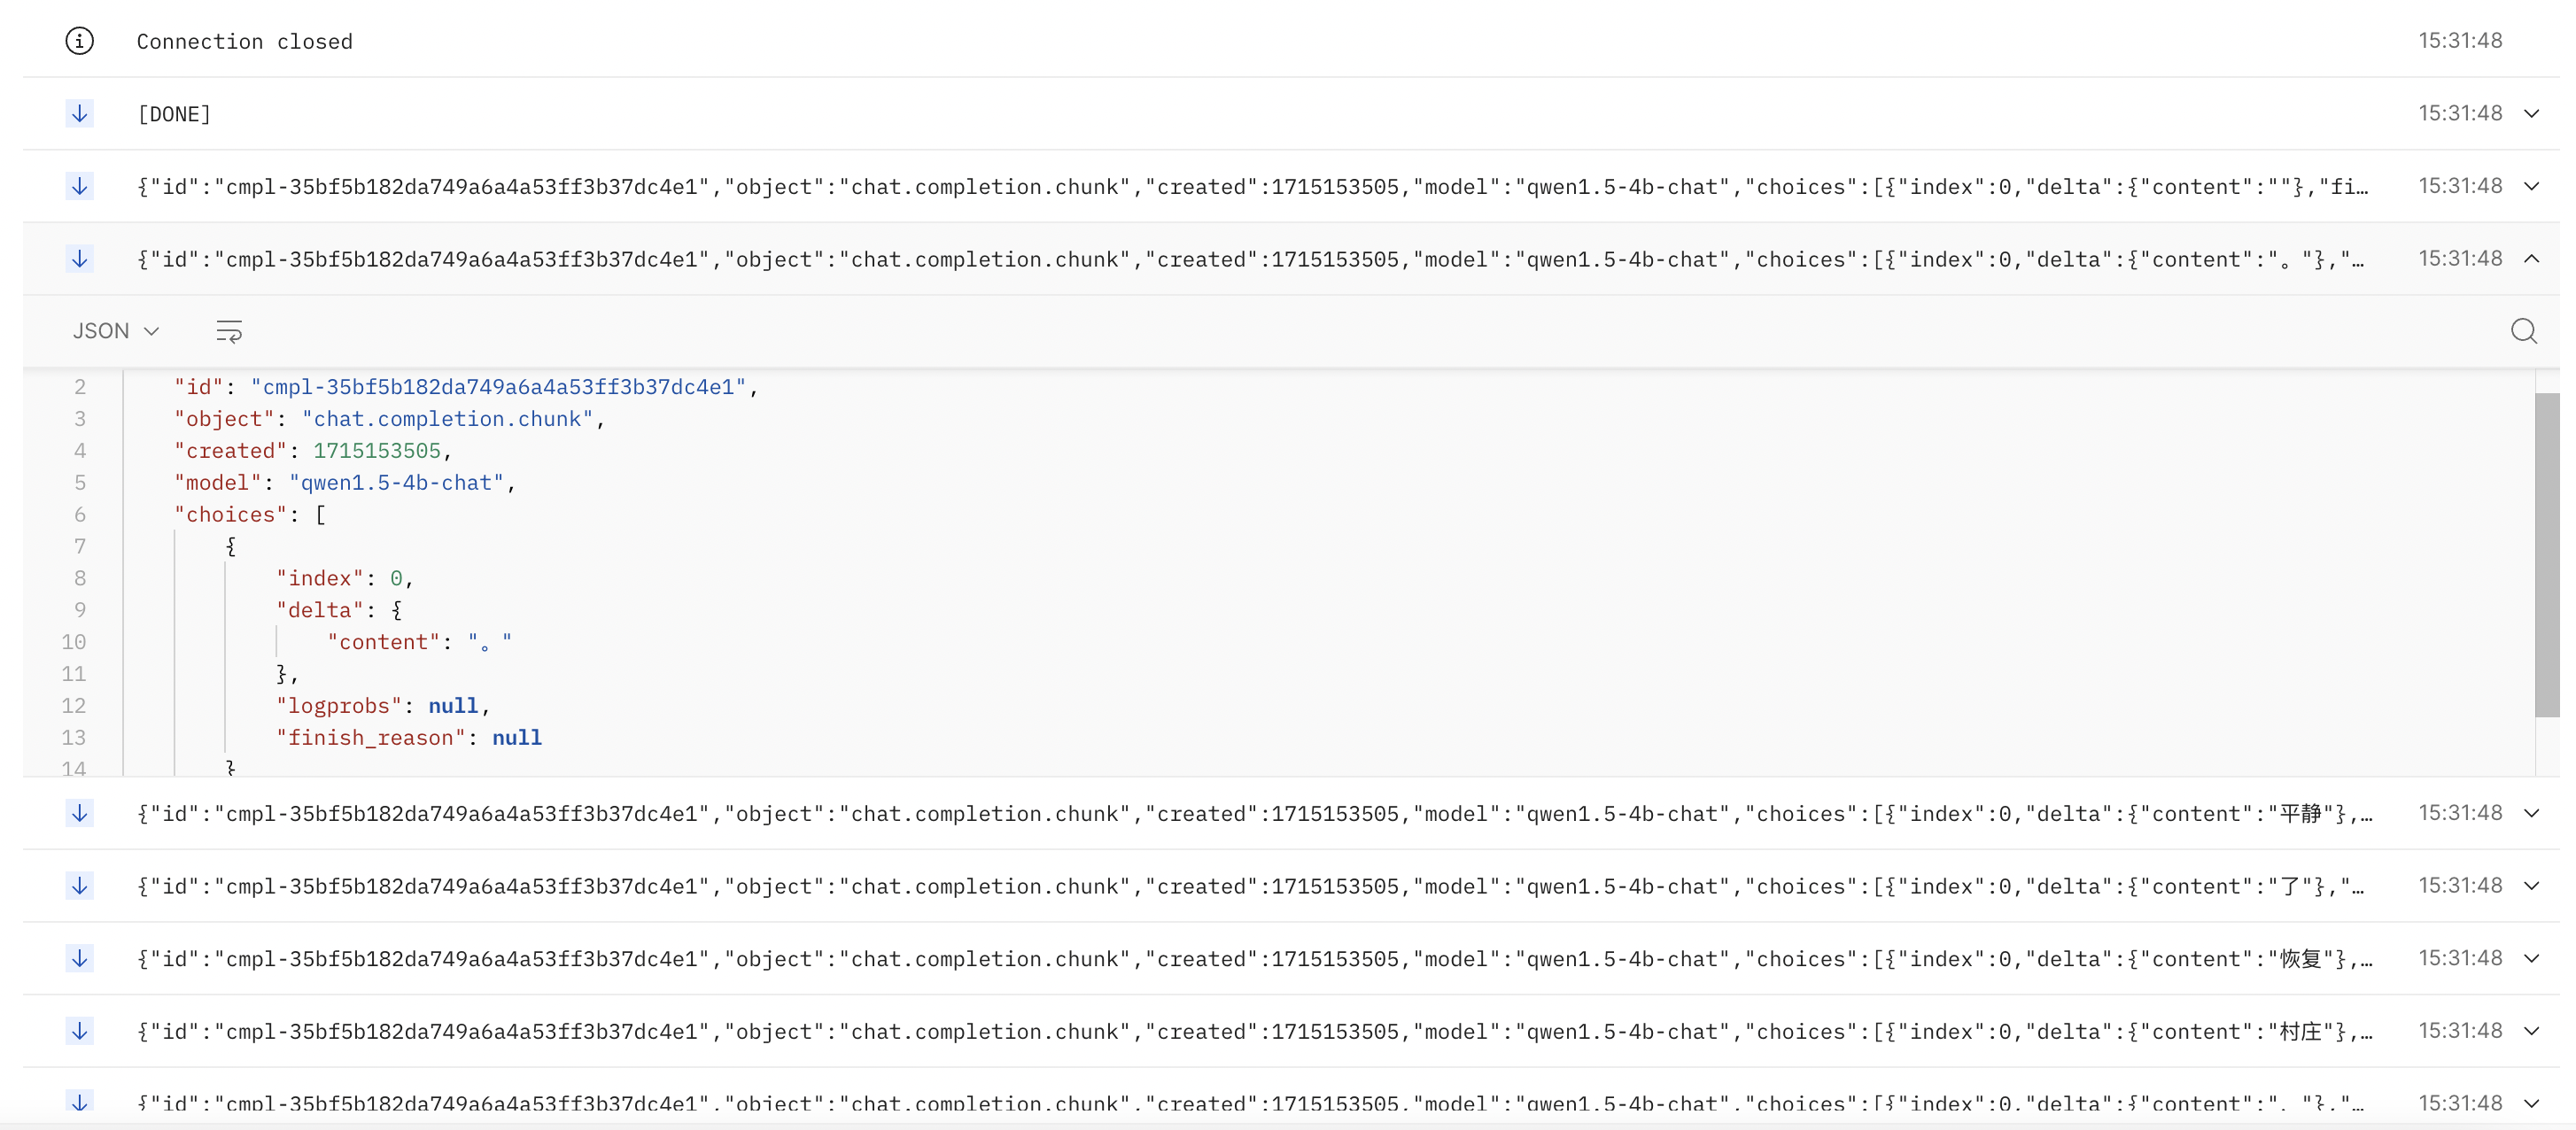
流式接口调用:
1
2
3
4
|
{
    "prompt": "你好,请给我讲一个故事,随便编一个",
    "system_prompt": ""
}
|
调用结果:

llama.cpp启动
llama.cpp是一个C++库,用于简化LLM推理的设置。该库是一个纯C/C++实现,不依赖任何外部库,并且针对x86架构提供了AVX、AVX2和AVX512加速支持。此外,它还提供了2、3、4、5、6以及8位量化功能,以加快推理速度并减少内存占用。对于大于总VRAM容量的大规模模型,该库还支持CPU+GPU混合推理模式进行部分加速。本质上,llama.cpp的用途在于运行GGUF(由GPT生成的统一格式)模型。llama.cpp的官方仓库地址如下:https://github.com/ggerganov/llama.cpp。我们将演示如何使用llama.cpp运行Qwen。
安装llama.cpp
1
2
3
4
|
git clone https://github.com/ggerganov/llama.cpp
cd llama.cpp

make
|
下载GGUF文件并启动
找到Qwen1.5-4B-Chat官方的GGUF文件:https://www.modelscope.cn/models/qwen/Qwen1.5-4B-Chat-GGUF/summary,下载到本地。
1
|
./main -m Qwen1.5-7B-Chat-GGUF -n 512 --color -i -cml -f prompts/chat-with-qwen.txt
|
-n代表要生成的最大token数量,如果要查看启动命令中的其他超参数介绍:
Ollama启动
Ollama帮助您通过少量命令即可在本地运行LLM。它适用于MacOS、Linux和Windows操作系统。
下载Ollama
Ollama的官方仓库:https://github.com/ollama/ollama
Ollama官网:https://ollama.com
Ollama的运行非常简单,对于Windows和MacOS,其专门制作了APP来运行。
Linux系统安装Ollama:
1
|
curl -fsSL https://ollama.com/install.sh | sh
|
运行Qwen1.5-4B-Chat
使用Ollama提供一个API服务
这样会在本地启动一个地址来访问,一般为http://localhost:11434
具体详细使用:https://github.com/ollama/ollama/blob/main/docs/api.md
这里写一下网上别人使用的记录:
1
2
3
4
5
|
curl http://localhost:11434/api/generate -d '{
    "model":"llama3",
    "prompt": "请分别翻译成中文、韩文、日文 -> Meta Llama 3: The most capable openly available LLM to date",
    "stream": false
}'
|
其他详细的参数解释:https://ducafecat.medium.com/%E7%A7%81%E6%9C%89%E5%8C%96%E9%83%A8%E7%BD%B2-llama3-%E5%A4%A7%E6%A8%A1%E5%9E%8B-%E6%94%AF%E6%8C%81-api-%E8%AE%BF%E9%97%AE-9012e17d9400
返回json数据:
 1
 2
 3
 4
 5
 6
 7
 8
 9
10
11
12
13
14
15
|
{
    "model": "llama3",
    "created_at": "2024-04-23T08:05:11.020314Z",
    "response": "Here are the translations:\n\n**Chinese:** 《Meta Llama 3》:迄今最强大的公开可用的LLM\n\n**Korean:** 《Meta Llama 3》:현재 가장 강력한 공개 사용 가능한 LLM\n\n**Japanese:**\n\n《Meta Llama 3》:現在最強の公開使用可能なLLM\n\n\n\nNote: (Meta Llama 3) is a literal translation, as there is no direct equivalent for \"Meta\" in Japanese. In Japan, it's common to use the English term \"\" or \"\" when referring to Meta.",
    "done": true,
    "context": [
        ...
    ],
    "total_duration": 30786629492,
    "load_duration": 3000782,
    "prompt_eval_count": 32,
    "prompt_eval_duration": 6142245000,
    "eval_count": 122,
    "eval_duration": 24639975000
}
|
vLLM启动
vLLM优化了内存的分配和搬运,它易于使用,且具有最先进的服务吞吐量、高效的注意力键值内存管理(通过PagedAttention实现)、连续批处理输入请求、优化的CUDA内核等功能。要了解更多关于vLLM的信息。
文档:https://vllm.readthedocs.io
vLLM环境依赖
vLLM对环境及GPU卡要求非常严格,支持CUDA118+Pytroch212和CUDA121+Pytorch212。
前者需要下载专门的pip包:
1
2
3
4
|
# Install vLLM with CUDA 11.8.
export VLLM_VERSION=0.4.0
export PYTHON_VERSION=39
pip install https://github.com/vllm-project/vllm/releases/download/v${VLLM_VERSION}/vllm-${VLLM_VERSION}+cu118-cp${PYTHON_VERSION}-cp${PYTHON_VERSION}-manylinux1_x86_64.whl --extra-index-url https://download.pytorch.org/whl/cu118
|
后者则直接下载vllm即可:
目前在服务器上能够成功的Docker环境示例如下:
 1
 2
 3
 4
 5
 6
 7
 8
 9
10
11
12
13
14
15
16
17
18
19
20
21
22
23
24
25
26
27
28
29
30
31
32
33
34
35
36
37
38
39
40
41
42
43
44
45
46
47
48
49
50
51
52
53
54
55
56
57
58
59
60
61
62
63
64
|
FROM nvidia/cuda:12.1.0-cudnn8-devel-ubuntu22.04
# 设置环境变量 非交互式
ENV DEBIAN_FRONTEND=noninteractive
# 指定工作目录
WORKDIR /model_infer

# 替换为阿里云的 Ubuntu 源
RUN sed -i 's/archive.ubuntu.com/mirrors.aliyun.com/g' /etc/apt/sources.list
RUN sed -i 's/security.ubuntu.com/mirrors.aliyun.com/g' /etc/apt/sources.list

# 更新其他必需的包
RUN apt-get update && apt-get install -y \
    zlib1g-dev \
    libbz2-dev \
    libssl-dev \
    libncurses5-dev \
    libsqlite3-dev \
    libreadline-dev \
    tk-dev \
    libgdbm-dev \
    libdb-dev \
    libpcap-dev \
    xz-utils \
    libexpat1-dev \
    liblzma-dev \
    libffi-dev \
    libc6-dev\
    wget \
    vim \
    curl

# 指定容器位置和时区
RUN ln -sf /usr/share/zoneinfo/Asia/Shanghai /etc/localtime && echo "Asia/Shanghai" > /etc/timezone

# 安装Python3.10
RUN cd /usr/local && \
    wget https://mirrors.huaweicloud.com/python/3.10.0/Python-3.10.0.tgz && \
    chmod +x Python-3.10.0.tgz && tar -xvf Python-3.10.0.tgz && \
    rm -rf Python-3.10.0.tgz && cd Python-3.10.0 && \
    ./configure --prefix=/usr/local/python3 --enable-optimizations && \
    make && make install && \
    rm -rf Python-3.10.0 && \
    ln -s /usr/local/python3/bin/python3.10 /usr/bin/python3 && \
    ln -s /usr/local/python3/bin/pip3 /usr/bin/pip3

# 替换为清华大学 pip 源
RUN mkdir -p /root/.pip \
    && echo "[global]" > /root/.pip/pip.conf \
    && echo "index-url = https://pypi.tuna.tsinghua.edu.cn/simple" >> /root/.pip/pip.conf \
    && echo "trusted-host = pypi.tuna.tsinghua.edu.cn" >> /root/.pip/pip.conf

# 安装Pytorch
RUN python3 -m pip install --upgrade pip && \
    pip3 install torch==2.1.2 torchvision==0.16.2 torchaudio==2.1.2 --index-url https://mirror.sjtu.edu.cn/pytorch-wheels/cu121

# 安装相关的包
RUN pip3 install transformers fastapi sse_starlette vllm accelerate openai

# 清除 pip 缓存
RUN rm -rf /root/.cache/pip/*

# 设置容器的编码为UTF-8
RUN echo 'LANG=en_US.UTF-8' > /etc/locale.conf && \
    echo 'LC_ALL=en_US.UTF-8' >> /etc/locale.conf
|
本地加载模型启动vLLM
vLLM和Transformer启动模型的代码略有不同。
 1
 2
 3
 4
 5
 6
 7
 8
 9
10
11
12
13
14
15
16
17
18
19
20
21
22
23
24
25
26
27
28
29
30
31
32
33
34
35
36
37
38
39
40
41
42
43
44
45
46
47
48
49
50
|
import torch
from transformers import AutoTokenizer
from vllm import LLM, SamplingParams
from threading import Thread

import os

from .model_zoo import *
from .utils import highlight_text


class vllmQwen1_5():
    def __init__(self, modelName) -> None:
        # 检查是否支持模型
        assert modelName in llm_weight_zoo, "modelName should be in {}".format(llm_weight_zoo.keys())
        modelWeightPath = llm_weight_zoo[modelName]
        # 检查本地是否下载模型
        assert os.path.exists(modelWeightPath), "Model weight file: {} ".format(modelWeightPath) + \
                                                "does not exist.\n Please download {} ".format(modelName) + \
                                                "model in " + \
                                                highlight_text("'{}'".format(llm_model_url_zoo[modelName]))
        # 加载分词器
        self.tokenizer = AutoTokenizer.from_pretrained(modelWeightPath)
        # 加载模型 Tesla T4需要使用float16 tokenizer=None会默认使用配套的标记器
        self.model = LLM(model=modelWeightPath, tokenizer=None,
                         dtype="auto", trust_remote_code=True,
                         max_model_len=2048)
        self.device = torch.device("cuda" if torch.cuda.is_available() else "cpu")
        self.model_name = modelName

    def get_prompt(self, user_message, system_message):
        if system_message == "":
            system_message = "You are a helpful assistant."

        assert user_message != None, "我是{}大模型,你必须输入提问问题".format(self.model_name)
        messages = [
            {"role": "system", "content": system_message},
            {"role": "user", "content": user_message}
        ]

        return messages

    def chat(self, messages, max_tokens=2048, temperature=0.9, top_p=0.8):
        # 调用模型进行对话生成
        sampling_params = SamplingParams(temperature=temperature, top_p=top_p, max_tokens=max_tokens)
        input_ids = self.tokenizer.apply_chat_template(messages, tokenize=False, add_generation_prompt=True)
        output = self.model.generate([input_ids], sampling_params)[0]
        response = output.outputs[0].text

        return response
|
这里并没有实现流式接口,对于模型启动的参数设置,可以参考文档:https://docs.vllm.ai/en/latest/models/engine_args.html
本地启动模型加载openai API服务
为了方便调用,vLLM包内部已经写好了调用api的服务,它的接口形式与OpenAI的接口格式是相同的。这样做的好处是本地私域大模型服务,也可以使用调用OpenAI接口的方式进行调用,更容易集成。
启动api:
 1
 2
 3
 4
 5
 6
 7
 8
 9
10
11
12
|
CUDA_VISIBLE_DEVICES=0 \
python3 -m vllm.entrypoints.openai.api_server \
--model ./data/model_zoo/llm_weight/qwen1.5-4b-chat \
--served-model-name qwen1.5-4b-chat \
--host 0.0.0.0 \
--port 10005 \
--max-model-len 2048 \
--dtype half \
--max-num-seqs 256 \
--gpu-memory-utilization 0.9 \
--lora-dtype="auto" \
--trust-remote-code
|
这里dtype参数设置为了half,是因为Tesla T4 GPU不支持Bfloat16的数据格式。更多的参数设置同样可以看模型启动的参数设置,与代码中的参数设置是相同的:https://docs.vllm.ai/en/latest/models/engine_args.html
服务调用结果示例
非流式调用:
1
2
3
4
5
6
7
8
|
{
    "model": "qwen1.5-4b-chat",
    "messages": [
        {"role": "system", "content": "You are a helpful assistant."},
        {"role": "user", "content": "你好,请给我讲一个的故事"}
    ],
    "temperature": 0
}
|
调用结果:
 1
 2
 3
 4
 5
 6
 7
 8
 9
10
11
12
13
14
15
16
17
18
19
20
21
22
23
|
{
    "id": "cmpl-6a53f4f0464c4088a55342a842927c64",
    "object": "chat.completion",
    "created": 1715152496,
    "model": "qwen1.5-4b-chat",
    "choices": [
        {
            "index": 0,
            "message": {
                "role": "assistant",
                "content": "好的,我来给你讲一个故事。从前,有一个小村庄,村庄里的人们过着平静的生活。有一天,村庄里来了一位神秘的老人,他告诉村民们,村庄的水源将会被污染,只有找到一种神奇的草药,才能拯救村庄。村民们开始寻找这种草药,最后,他们找到了一种叫做“生命之草”的草药,用它净化了水源,村庄恢复了平静。"
            },
            "logprobs": null,
            "finish_reason": "stop",
            "stop_reason": null
        }
    ],
    "usage": {
        "prompt_tokens": 26,
        "total_tokens": 117,
        "completion_tokens": 91
    }
}
|
流式调用:
1
2
3
4
5
6
7
8
9
|
{
    "model": "qwen1.5-4b-chat",
    "messages": [
        {"role": "system", "content": "You are a helpful assistant."},
        {"role": "user", "content": "你好,请给我讲一个的故事"}
    ],
    "temperature": 0,
    "stream": true
}
|
调用结果:
你也可以使用Python脚本来调用OpenAI的接口:
 1
 2
 3
 4
 5
 6
 7
 8
 9
10
11
12
13
14
15
16
17
18
19
20
21
22
23
24
25
26
27
28
29
30
31
32
33
34
35
36
37
38
39
40
41
42
43
44
45
46
47
48
49
50
51
52
53
54
55
56
57
58
59
60
61
62
63
64
65
66
67
68
69
70
71
72
73
74
|
import requests
import json

headers = {
    "Content-Type": "application/json"
}

def post(url, json, headers):
    response = requests.post(url, json=json, headers=headers)
    return response

def streamPost(url, json, headers):
    response = requests.post(url, json=json, headers=headers, stream=True)
    return response

if __name__ == "__main__":
    ip = "localhost"
    port = 10005


    sys_prompt = """
    你是一个乐于助人的助手
    """

    prompt = """
    请给我讲一个故事
    """

    body = {
        "model": "qwen1.5-4b-chat",
        "messages": [
            {"role": "system", "content": sys_prompt},
            {"role": "user", "content": prompt}
        ],
        "temperature": 0
    }

    stream_body = {
        "model": "qwen1.5-4b-chat",
        "messages": [
            {"role": "system", "content": sys_prompt},
            {"role": "user", "content": prompt}
        ],
        "temperature": 0,
        "stream": True
    }

    url = f"http://{ip}:{port}/v1/chat/completions"

    # 发送 POST 请求
    response = post(url, json=body, headers=headers)

    # 解析响应
    if response.status_code == 200:
        print("Return:", response.text)
    else:
        print("Error:", response.text)

    # 发送stream Post 请求
    response = streamPost(url, json=stream_body, headers=headers)
    full_text = ""
    for line in response.iter_lines():
        if line:
            line_str = line.decode("utf-8")
            print(line_str)
            data = json.loads(line_str.split(": ", 1)[1])
            if data["choices"][0]["finish_reason"] != "stop":
                if data["choices"][0]["delta"].get("content") is not None:
                    full_text += data["choices"][0]["delta"]["content"]
                else:
                    continue
            else:
                break
    print("大模型完整回答:\n", full_text)
|
SkyPilot部署
SkyPilot是一个可以在任何云上运行LLM、AI应用以及批量任务的框架,旨在实现最大程度的成本节省、最高的GPU可用性以及受管理的执行过程。其特性包括:
-
通过跨区域和跨云充分利用多个资源池,以获得最佳的GPU可用性。
-
把费用降到最低—— SkyPilot在各区域和云平台中为您挑选最便宜的资源。无需任何托管解决方案的额外加价。
-
将服务扩展到多个副本上,所有副本通过单一endpoint对外提供服务
-
所有内容均保存在您的云账户中(包括您的虚拟机和bucket)
-
完全私密 - 没有其他人能看到您的聊天记录
安装SkyPilot
1
|
pip install "skypilot-nightly[aws,gcp]"
|
检查是否可用
你也参考官方文档:https://skypilot.readthedocs.io/en/latest/getting-started/installation.html
运行Qwen1.5-72B-Chat
- 可以使用 serve-72b.yaml 中的可用的 GPU 来在单个实例上部署 Qwen1.5-72B-Chat的基于vLLM的适配OpenAI API的服务
1
|
sky launch -c qwen serve-72b.yaml
|
向该endpoint发送续写请求:
1
2
3
4
5
6
7
8
9
|
IP=$(sky status --ip qwen)

curl -L http://$IP:8000/v1/completions \
    -H "Content-Type: application/json" \
    -d '{
      "model": "Qwen/Qwen1.5-72B-Chat",
      "prompt": "My favorite food is",
      "max_tokens": 512
  }' | jq -r '.choices[0].text'
|
向该endpoint发送chat请求
 1
 2
 3
 4
 5
 6
 7
 8
 9
10
11
12
13
14
15
16
|
curl -L http://$IP:8000/v1/chat/completions \
    -H "Content-Type: application/json" \
    -d '{
      "model": "Qwen/Qwen1.5-72B-Chat",
      "messages": [
        {
          "role": "system",
          "content": "You are a helpful and honest chat expert."
        },
        {
          "role": "user",
          "content": "What is the best food?"
        }
      ],
      "max_tokens": 512
  }' | jq -r '.choices[0].message.content'
|
第三方LLM框架接入
目前使用大模型做应用的成熟框架有两款:LangChain以及llama_index。
LangChain相对使用更为广泛,代码更新频率相对较慢,功能范围更广泛。
llama_index使用并没有那么广泛,代码更新频率很快,支持的东西更细致,集成度更高,其本身也兼容了LangChain的部分功能,文档更加细致。
LangChain官方文档:https://python.langchain.com/docs/get_started/introduction
llama_index官方文档:https://docs.llamaindex.ai/en/stable
LangChain, llama_index本地启动模型
LangChain和llama_index都支持本地加载模型做对应的应用。其也支持不同的启动框架,包括原生Transformers,llama.cpp,Ollama以及vLLM等。
具体实现请查看其官方文档。
Langchain, llama_index调用本地OpenAI接口服务
由于GPU资源有限,对于大模型服务通常会使用并发框架vLLM单独封装启动OpenAI格式的接口,上层应用调用下层暴露的接口。
LangChain调用
使用ChatOpenAI函数:
 1
 2
 3
 4
 5
 6
 7
 8
 9
10
11
12
13
14
15
16
17
18
19
20
21
22
23
24
25
26
27
28
29
30
31
32
33
34
35
36
37
38
39
40
41
42
43
44
45
46
|
from langchain.prompts import PromptTemplate
from langchain_openai import ChatOpenAI
from langchain_community.llms import VLLMOpenAI

template = """
你是一名NLP算法工程师,现在你需要执行一个信息概述的任务:根据用户输入的产品相关信息,总结生成一段该产品的介绍性话术。
为了得到符合要求的答案,请按照下面的过程,一步步思考并得出回答:
1、观察以下话术样例,学习产品介绍性话术的描述方式:[和对讲是融合集群调度和视频能力的公网对讲产品,依托于中国移动通信网络面向用户提供无距离限制、安全可靠、低时延的超高清视频对讲服务具备灵活组织架构管理、地图可视化调度、软硬终端互通、数据云化备份等优势可根据客户需求进行入驻式和定制化开发,为行业用户提供全方位综合调度管理系统。]。
2、你会拿到产品名称、产品简介、产品应用场景、产品功能、产品优势信息这六个字段信息,你需要逐字逐句的阅读过去,了解该产品的全貌信息。
3、仿造第1步的话术描述方式,结合你拿到的产品信息,用你自己的语言生成一段针对该产品的介绍性话术。
4、使用第三步生成的话术,进行精简润色,最终压缩到200字以内。
最后强调一下:生成的答案必须严格经过这三个步骤,且严格限制只能使用我提供给你的信息,严禁生成额外信息。

% USER INPUT:
{user_input}

YOUR RESPONSE:
"""

# 将我们的格式描述嵌入到prompt中去,告诉llm我们需要他输出什么样格式的内容
prompt = PromptTemplate(
    input_variables=["user_input"],
    template=template
)

llm = ChatOpenAI(
    openai_api_key="EMPTY",
    openai_api_base="http://20.20.136.251:10005/v1",
    model_name="qwen1.5-4b-chat",
    temperature=0,
)

# 使用这种接口输出的格式与上述函数是相同的

# llm = VLLMOpenAI(
#     openai_api_key="EMPTY",
#     openai_api_base="http://20.20.136.251:10005/v1",
#     model_name="qwen1.5-4b-chat",
#     temperature=0.8,
#     streaming=True,
# )

llm_chain = LLMChain(prompt=prompt, llm=llm)
user_input = "产品名称:商务快线。产品简介:商务快线是指以有线方式提供的、面向中小企业客户的互联网宽带接入服务。其满足客户对静态IP需求的同时,可提供多种增值业务,一站式解决企业客户多种信息化需求。产品应用场景:(高端酒店、商务楼宇、产业园区)。产品功能:(提供千兆宽带高速上网,多样化实惠套餐,以及专席客服保障的高品质服务。)。产品优势信息:(提供静态IP的大宽带网络接入,确保流畅上网体验,并以网络接入为基础,提供一站式解决方案,覆盖公共WiFi、语音通话、娱乐、安全、监控和企业办公等多样化需求。)。请针对以上产品,生成一段200字以内的介绍性话术。"

print(llm_chain.invoke(user_input))
|
输出结果:
1
|
{'user_input': '产品名称:商务快线。产品简介:商务快线是指以有线方式提供的、面向中小企业客户的互联网宽带接入服务。其满足客户对静态IP需求的同时,可提供多种增值业务,一站式解决企业客户多种信息化需求。产品应用场景:(高端酒店、商务楼宇、产业园区)。产品功能:(提供千兆宽带高速上网,多样化实惠套餐,以及专席客服保障的高品质服务。)。产品优势信息:(提供静态IP的大宽带网络接入,确保流畅上网体验,并以网络接入为基础,提供一站式解决方案,覆盖公共WiFi、语音通话、娱乐、安全、监控和企业办公等多样化需求。)。请针对以上产品,生成一段200字以内的介绍性话术。', 'text': '商务快线是面向中小企业客户的互联网宽带接入服务,以有线方式提供,满足客户对静态IP的需求,同时提供多种增值业务,一站式解决企业客户多种信息化需求。其应用场景广泛,包括高端酒店、商务楼宇、产业园区等。商务快线提供千兆宽带高速上网,多样化实惠套餐,以及专席客服保障的高品质服务。商务快线的优势在于,它提供静态IP的大宽带网络接入,确保流畅上网体验,并以网络接入为基础,提供一站式解决方案,覆盖公共WiFi、语音通话、娱乐、安全、监控和企业办公等多样化需求。'}
|
你也可以直接使用llm的流式输出接口:
 1
 2
 3
 4
 5
 6
 7
 8
 9
10
11
12
13
14
15
16
17
18
19
20
21
22
|
from langchain_openai import ChatOpenAI
from langchain_community.llms import VLLMOpenAI

llm = ChatOpenAI(
    openai_api_key="EMPTY",
    openai_api_base="http://20.20.136.251:10005/v1",
    model_name="qwen1.5-4b-chat",
    temperature=0,
    streaming=True
)


messages = [
    ("system", "你是编程助手。"),
    ("human", "把下面这句代码写一下注释:print('你好')"),
]


print(llm.invoke(messages)) # 普通输出
# 流式输出
for chunk in llm.stream(messages):
    print(chunk)
|
输出内容:
 1
 2
 3
 4
 5
 6
 7
 8
 9
10
11
12
13
14
15
16
17
18
19
20
21
22
23
24
25
26
27
28
29
30
31
32
33
34
35
36
37
38
39
40
41
42
|
content='```python\n# 这是Python语言的print函数,用于在控制台输出文本\nprint(\'你好\')\n```\n\n这段代码的作用是在控制台输出字符串 "你好"。' response_metadata={'finish_reason': 'stop'} id='run-8e6c2718-d53f-4693-9bd3-25fa70c36bdd-0'

content='' id='run-70885497-4254-4dca-a50e-c0a376165907'
content='```' id='run-70885497-4254-4dca-a50e-c0a376165907'
content='python' id='run-70885497-4254-4dca-a50e-c0a376165907'
content='\n' id='run-70885497-4254-4dca-a50e-c0a376165907'
content='#' id='run-70885497-4254-4dca-a50e-c0a376165907'
content='' id='run-70885497-4254-4dca-a50e-c0a376165907'
content=' 这' id='run-70885497-4254-4dca-a50e-c0a376165907'
content='是' id='run-70885497-4254-4dca-a50e-c0a376165907'
content='Python' id='run-70885497-4254-4dca-a50e-c0a376165907'
content='语言' id='run-70885497-4254-4dca-a50e-c0a376165907'
content='的' id='run-70885497-4254-4dca-a50e-c0a376165907'
content='print' id='run-70885497-4254-4dca-a50e-c0a376165907'
content='函数' id='run-70885497-4254-4dca-a50e-c0a376165907'
content=',' id='run-70885497-4254-4dca-a50e-c0a376165907'
content='用于' id='run-70885497-4254-4dca-a50e-c0a376165907'
content='在' id='run-70885497-4254-4dca-a50e-c0a376165907'
content='控制' id='run-70885497-4254-4dca-a50e-c0a376165907'
content='台' id='run-70885497-4254-4dca-a50e-c0a376165907'
content='输出' id='run-70885497-4254-4dca-a50e-c0a376165907'
content='文本' id='run-70885497-4254-4dca-a50e-c0a376165907'
content='\n' id='run-70885497-4254-4dca-a50e-c0a376165907'
content='print' id='run-70885497-4254-4dca-a50e-c0a376165907'
content="('" id='run-70885497-4254-4dca-a50e-c0a376165907'
content='你好' id='run-70885497-4254-4dca-a50e-c0a376165907'
content="')\n" id='run-70885497-4254-4dca-a50e-c0a376165907'
content='``' id='run-70885497-4254-4dca-a50e-c0a376165907'
content='`\n\n' id='run-70885497-4254-4dca-a50e-c0a376165907'
content='这段' id='run-70885497-4254-4dca-a50e-c0a376165907'
content='代码' id='run-70885497-4254-4dca-a50e-c0a376165907'
content='的作用' id='run-70885497-4254-4dca-a50e-c0a376165907'
content='是在' id='run-70885497-4254-4dca-a50e-c0a376165907'
content='控制' id='run-70885497-4254-4dca-a50e-c0a376165907'
content='台' id='run-70885497-4254-4dca-a50e-c0a376165907'
content='输出' id='run-70885497-4254-4dca-a50e-c0a376165907'
content='字符串' id='run-70885497-4254-4dca-a50e-c0a376165907'
content=' "' id='run-70885497-4254-4dca-a50e-c0a376165907'
content='你好' id='run-70885497-4254-4dca-a50e-c0a376165907'
content='"' id='run-70885497-4254-4dca-a50e-c0a376165907'
content='。' id='run-70885497-4254-4dca-a50e-c0a376165907'
content='' response_metadata={'finish_reason': 'stop'} id='run-70885497-4254-4dca-a50e-c0a376165907'
|
llama_index调用
llama_index调用OpenAI的接口都使用OpenAILike模块:
 1
 2
 3
 4
 5
 6
 7
 8
 9
10
11
12
13
14
15
16
17
18
19
20
21
22
23
24
25
26
|
from llama_index.llms.openai_like import OpenAILike
from llama_index.llms import ChatMessage


llm3 = OpenAILike(
    model="qwen1.5-4b-chat",
    api_base="http://20.20.136.251:10005/v1",
    api_key="EMPTY",
    is_chat_model=True,
    temperature="0.8",
    timeout=60
)


messages_2 = [
                ChatMessage(role="system", content="You are a helpful assistant."),
                ChatMessage(role="user", content="你好,请给我讲一个故事"),
            ]

response = llm3.chat(messages=messages_2)
print(response)

# 流式输出
for chunk in llm3.stream_chat(messages=messages_2):
    print(chunk, flush=True)
|
调用结果:
 1
 2
 3
 4
 5
 6
 7
 8
 9
10
11
12
13
14
15
16
17
18
19
20
21
22
23
24
25
26
27
28
29
30
31
32
33
34
|
# 非流式
assistant: 好的,我来给你讲一个故事吧。从前,有一只小猫,他很聪明,也很勇敢。有一天,小猫决定去森林探险,他遇到了一只凶猛的老虎,但是小猫没有害怕,他用智慧和勇气战胜了老虎。最后,小猫成功地回到了家。
# 流式
assistant:
assistant: 当然
assistant: 当然可以
assistant: 当然可以,
assistant: 当然可以,以下
assistant: 当然可以,以下是一个
assistant: 当然可以,以下是一个故事
assistant: 当然可以,以下是一个故事的
assistant: 当然可以,以下是一个故事的开始
assistant: 当然可以,以下是一个故事的开始:


assistant: 当然可以,以下是一个故事的开始:

从前
assistant: 当然可以,以下是一个故事的开始:

从前,
assistant: 当然可以,以下是一个故事的开始:

从前,有一个
assistant: 当然可以,以下是一个故事的开始:

从前,有一个男孩
assistant: 当然可以,以下是一个故事的开始:

从前,有一个男孩叫
assistant: 当然可以,以下是一个故事的开始:

从前,有一个男孩叫杰
...
|
目前llama_index的流式调用输出很怪,后续会继续修改!
最后修改于 2024-05-07

本作品采用
知识共享署名-非商业性使用-相同方式共享 4.0 国际许可协议进行许可。